Walking Development
Think • Code • Try • Fail (Repeat)
Getting my quadruped to walk has been difficult, and while I haven’t solved the problem yet, this is a quick update; things I’ve tried, how my current walkign mechanism works, and what can be fixed to make thigns better.
Let’s start from the beginning. Walking can involve various walking gaits, which are basically different patterns of stepping with each leg. I decided to try to program a “trot” gait, where the legs opposite each other (top right and bottom left, for example) take steps at the same time. When one pair of legs put their feet down, then the other ones take a step. You can see spot from boston dynamics doing this here:
It’s important to also understand the ways that the robot can walk in different directions; will the robot do translational walking (where the orientation is always the same but the robot moves left, right, forwards, and backwards), rotational walking (where the robot turns to go different directions, what you see in dogs, for example), or both? Of course, I chose to attempt both, just like mit mini cheetah, but started on the translation first.
My entire mechanism works on a cosine-wave sinudoid. Since my inverse kinematics engine works on real-world coordinates, in millimeters, it is simple to have the robot’s foot track a set of points, or a curve. In order to take a step, the foot needs to move up and back down while moving forwards, so using a function that has that characteristic, going up and down, is perfect. The cosine is a natural choice since I can easily change the amplitude and period of the wave, which will modify the step height and step distance, respectively (the step actually encompasses only half the period, or until the function hits a zero). The great thing about this is that I can make and modify gaits extremely easily; I designed my first gait in desmos!
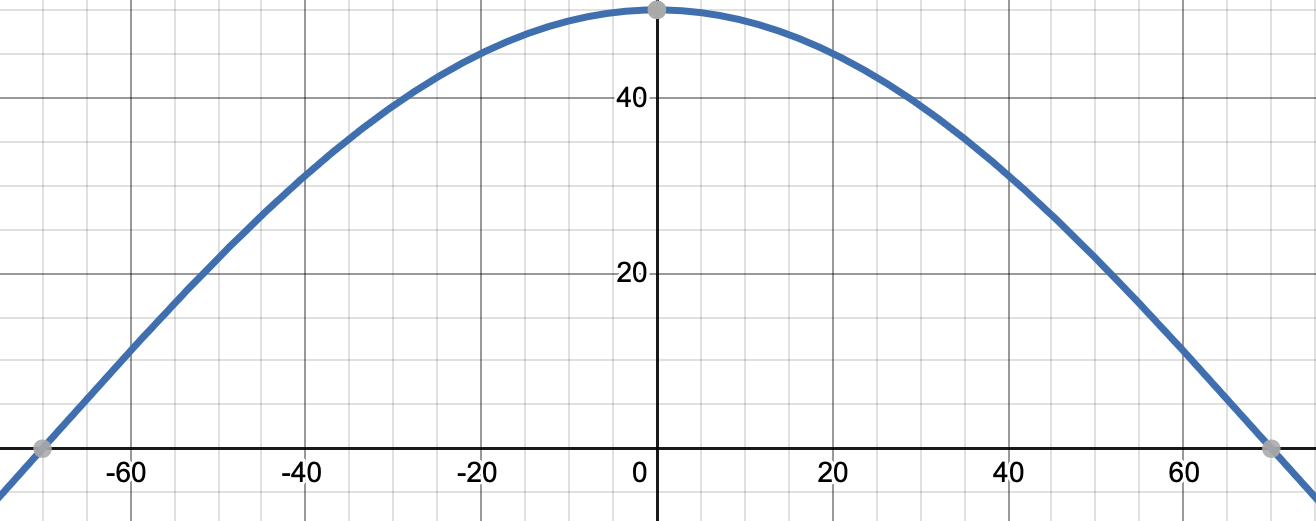
The graph of \( 50 * \cos (\frac{\pi x}{140}) \)
Now how can we get our robot to take a step? Well, it’s simple! use a variable to represent the x position of the foot (on the graph), and increment/decrement x at a regular interval. Whenever the foot finishes it’s step, simply set the step height to 0, and when x gets to the end of the draw-back period (what I’m calling the push phase after you take a step forwards), set the foot height to be a function of x again!
But wait a second… That just allows you to move fowards. Just moving backwards will take extra coding! We want translation, which means that the robot needs to be able to dynamically change the endpoint of the foot.
So how can we set the endpoint of the foot? Well, let’s first think about how this thing will be steered; with a joystick. Joysticks provide a 2d value: an x and a y, which can be used to allow the robot to move in 2d space on the ground (translational movement). Imagine that the place on the ground that the foot stands (when not moving) is the origin of an imaginary coordinate axis. Assuming that the distance that the foot steps is always the same, a circle with a diameter of the step distance and an origin at the cartesian origin defines all possible step endpoints. Then, using the x and y coordinates of the joystick, a line representing the trajectory of the foot from the perspective of the top of the robot can be graphed going in the same direction as the actual joystick. Here’s an image to recap:

Notice that there is a relationship between the circle and the line; the slope of the line is \frac{y}{x} and the function of the circle is \(x^2 + y^2 = i^2\) (where i is half the length of the step). By solving for x or y in this system of equations, it will be easy to solve for a step endpoint given a joystick coordinate and a step length. Let's solve for x first.
\(x^{2} + y^{2} = i^{2}\) \(\to\) \(x^{2}+m^{2}x^{2} = i^{2}\) \(\to\) \(x^{2} = \frac{i^{2}}{1 + m^{2}} \) \(\to\) \(x = \frac{i}{(1+m^{2})^{1/2}}\)
Solving for y follows the same logic:
\( \frac{y}{x} = m\to \frac{y}{m} = x\)
\(x^{2} + y^{2} = i^{2}\) \(\to\) \(\frac{y^{2}}{m^{2}} + y^{2} = i^{2} \) \(\to\) \(y^{2} = \frac{i^{2}}{(\frac{1}{m^{2}} + 1)}\) \(\to\) \(y = \frac{im}{(1+m^{2})^{1/2}}\)
This yields:
\(x = \frac{i}{(1+m^{2})^{1/2}}\) \(y = \frac{im}{(1+m^{2})^{1/2}}\)
This means that we can solve for a foot endpoint in the x, y coordinate system (relative to the robot) using a joystick coordinate, given by (x,y), and a step distance, given by i!
In code:
movementGradient = (controlCoordinateY / controlCoordinateX);

stepEndpointX = ((periodHalf/2) / sqrt(1 + pow(movementGradient, 2)));
stepEndpointY = (((periodHalf/2) * abs(movementGradient)) / sqrt(1 + pow(movementGradient, 2)));
How does this tie into walking? Well, we can now solve for a foot endpoint whenever necessary and simply interpolate foot’s x/y position to the endpoint position over the period of time that the step takes. As long as the time that the interpolation takes is equal to the time it takes for an x variable to go across the walking curve (from before, remember?), this sequence will work alright. The time can be calculated like this, in code:
long completionTime = (long)((TIME_TO_UPDATE - 1) * (periodHalf/(2 * GAIT_POSITION_INCREMENT)));Where TIME_TO_UPDATE is the time between increments of the curve x, periodHalf is half the period of the curve, or simply the step length, and GAIT_POSITION_INCREMENT is the amount incremented to the curve x at every update.
Finally, there is one more thing to consider: when to update the endpoint. Since there are two pairs of legs that are offset by half the cycle from each other, the endpoints of all the legs must be set at the same time or the robot will fall over. I found that a good time to update is when the x for the curve is at the origin, or when the pairs of legs are in the same place looking from the top.
Here is the finished product:
So how did this really work out?
Well, not so well. And thus, over the course of roughly 2 weeks, I tried everything I could think of.
The first thing I believed to be an issue was how the robot pushed off the ground. As can be seen in the video, the robot’s feet barely leave the floor. When walking, you typically use your toes to flick your body forwards, just a little bit, and it can be see in this video of a horse trotting (mother nature can do it best!)
My idea was give the drawback phase it’s own curve, where the height goes into the ground. That would lift the robot up a little, allowing it to have an easier time taking a step, hopefully. I decided to make a video showcasing the things I tried over roughly one week.
As you watch the video, you’ll notice that I experiment with some things. First, the width of the stance of the robot. Bringing the legs towards the center of the robot is similar to what boston dynamics does, however It makes it more difficult to remain statically stable (no IMU feedback, unlike spot). A wider stance is more statically stable, however it makes the walk more jerky since small inaccuracies will cause the robot to be more likely to tip over. Finally, you’ll notice that I can get the robot to “walk” after switching feet, from a grippy foam foot to a smooth plastic foot. This revealed to me what the big problem was with my design; the feet still weren’t getting off the ground! Smooth feet allowed the robot to skate. Grippy feet never worked because they would get in the way of the skating.
While the skate is a cool movement, it doesn’t qualify as walking to me; I need to do better. In the future, I’ll experiment with different gait patterns and step lengths, and soon, hopefully, this robot will be walking!
Problems, so far:
Well, for one, it isn’t walking yet. Here are some things I’m going to investigate:
- The legs look too weak and the leg mechanism look too loose. The feet may not be getting off the ground because the legs still on the ground during a step may simply be failing under a greater weight.
- Adding IMU feedback to allow the robot to stay as flat as possible. Static walking doesn’t work well because a small error can compound quickly; there is no reaction to bad movement.
- Completely redesigning my code structure. It is ugly! I want to be able to easily change gait patterns and be able to switch from a trot to a 3-legged walk, add pauses between steps, and more. This is going to be a top priority, since I think that a 3-legged walk may help to solve some of the problems above…
That’s all for now!
